Filter Display Function
The filter display function narrows down frames shown in Monitor Window and Each ID Window.
Settings are configured in Display Filter Window.
- Select display targets
In addition to specifying individual CAN IDs, detailed conditions such as range and exclusion can be configured.
This enables quick confirmation of only required frames from large amounts of data.
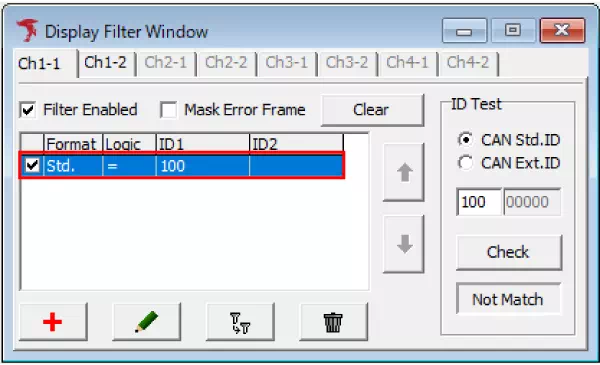
Display Filter Window Screen Description
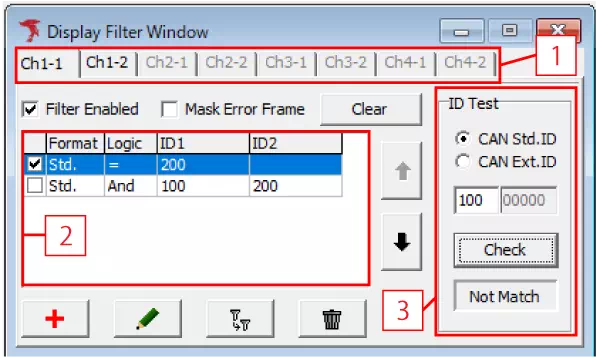
| Item | Description |
|---|---|
| [1] | Selects the channel to configure filter settings. |
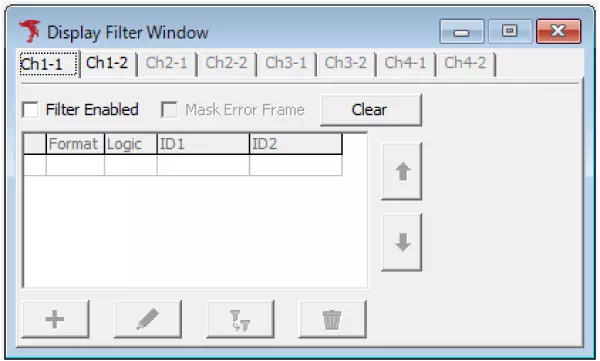
| Filter Enabled | Enables/disables the entire display filter. |
| Mask Error Frame | Enables/disables masking of error frames. If ON, error frames are hidden. |
| Clear button | Deletes all filters for the selected channel. |
| [2] | Shows configured filter IDs. Each item can be enabled/disabled with checkboxes. |
 button button | Moves the selected filter. |
 button button | Adds a new filter condition. Clicking opens Display Filter Setting dialog. |
 button button | Edits selected filter. Clicking opens Display Filter Setting dialog. |
 button button | Copies selected filter. |
 button button | Deletes selected filter. |
| [3] (*) | Checks whether the ID entered in ID Test matches configured filter IDs. Click Check to display Match if it matches any enabled filter. |
*: ID Test is displayed only when Filter Enabled is checked.
Display Filter Setup Procedure
- Open Display Filter Window
SelectDisplay Filter Windowfrom menu or toolbar.
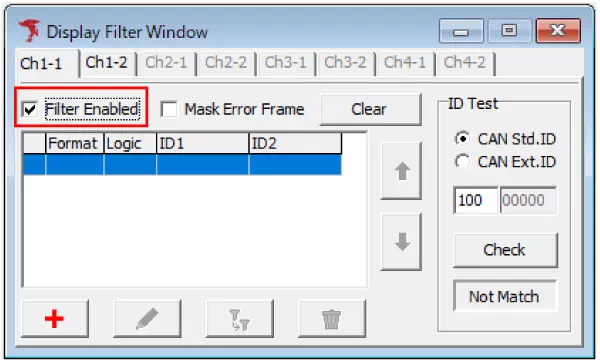
- Enable Filter Enabled
Turn ON theFilter Enabledcheckbox.
- Add new filter
Click to open Display Filter Setting dialog and configure target IDs.
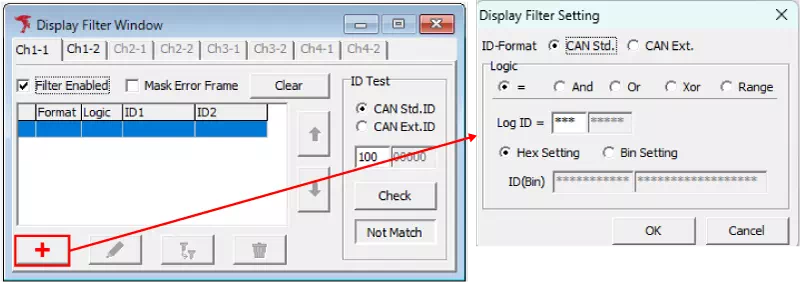
- Configure filter conditions
| Logic | Expression | Description | Usage & Example |
|---|---|---|---|
= | Log ID = ID1 | Matches when log ID is exactly ID1. Wildcard * is available. | Show only specific IDs. Example: Log ID = 0x100. |
And | (Log ID & ID1) = ID2 | Matches when bitwise AND result equals ID2. | Check required bits. Example: (Log ID & 0x040) = 0x040. |
Or | (Log ID | ID1) = ID2 | Matches when bitwise OR result equals ID2. | Show IDs with any target bits set. |
Xor | (Log ID ^ ID1) = ID2 | Matches when bitwise XOR result equals ID2. | Check bit inversion conditions. |
Range | Log ID = ID1 ~ ID2 | Matches IDs within range ID1 to ID2. | Show a block of IDs. Example: 0x100~0x1FF. |
When using Or or Xor, verify behavior with ID Test -> Check.
- Enable filter
Configured filters appear in the list. Turn ON the checkbox of each filter to activate it.
- Start monitoring
When monitoring starts, frame display in Monitor Window and Each ID Window is filtered.
Note: Display Filter is not applied to Analyze Window or log files.
When Display Filter is enabled�
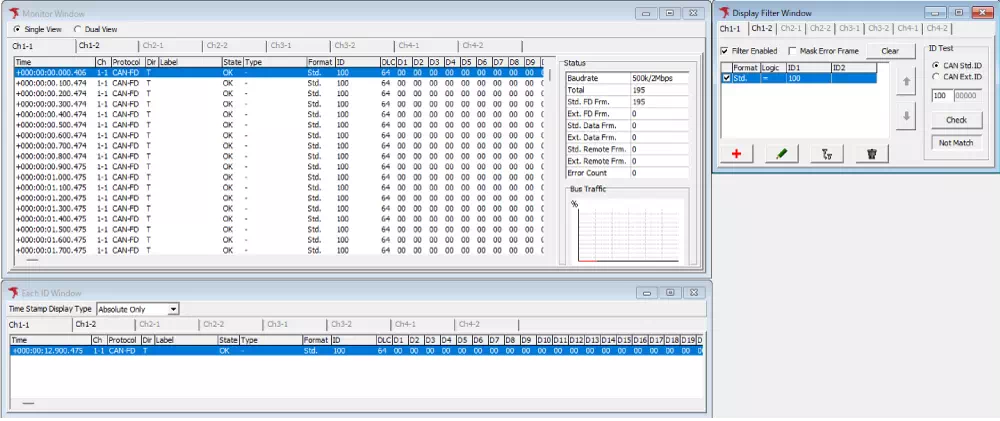
Only frame data for configured CAN ID 100 is displayed.
When Display Filter is disabled
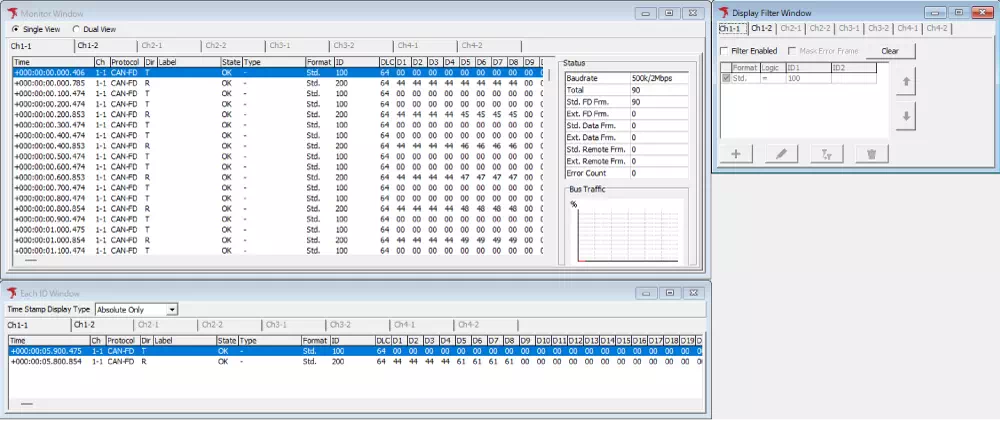
All log data (CAN ID 100 and 200) is displayed.
Filter ID Check Function
You can manually verify whether configured filter conditions work as intended.
How to use
- Enter a CAN ID (hex) into ID Test input field
- Click
Check
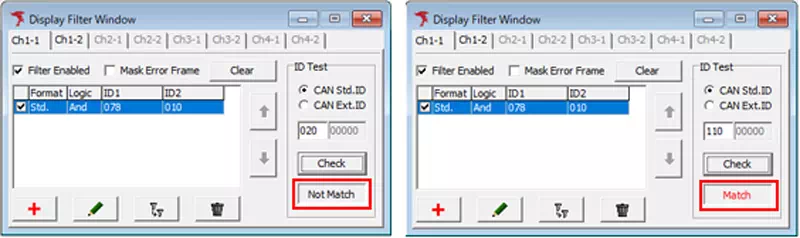
| Result | Description |
|---|---|
| Match | Matches at least one enabled filter condition |
| Not Match | Matches none of the filter conditions |
Using ID Test, you can immediately check whether any ID matches current filter settings.