Filtered Display
This page describes display filters for source frames. Distinguish them from the analysis Set in Signal Analysis and signal Values/Graph display targets. To investigate signal values, see Signal Analysis.
Filtered display narrows down the frames shown in “Analyze Window.” The “Filtering” tab in both “Ch Log” and “Analyze” provides the following filters.
- Exclude error frames (Error Filtering)
- Filter by CAN ID (ID Filtering)
- Filter by label (Label Filtering)
Filtering Tab Reference
Open “Filtering” below the log and select a filter type in ①. Configure target IDs in ② or target labels in ③.
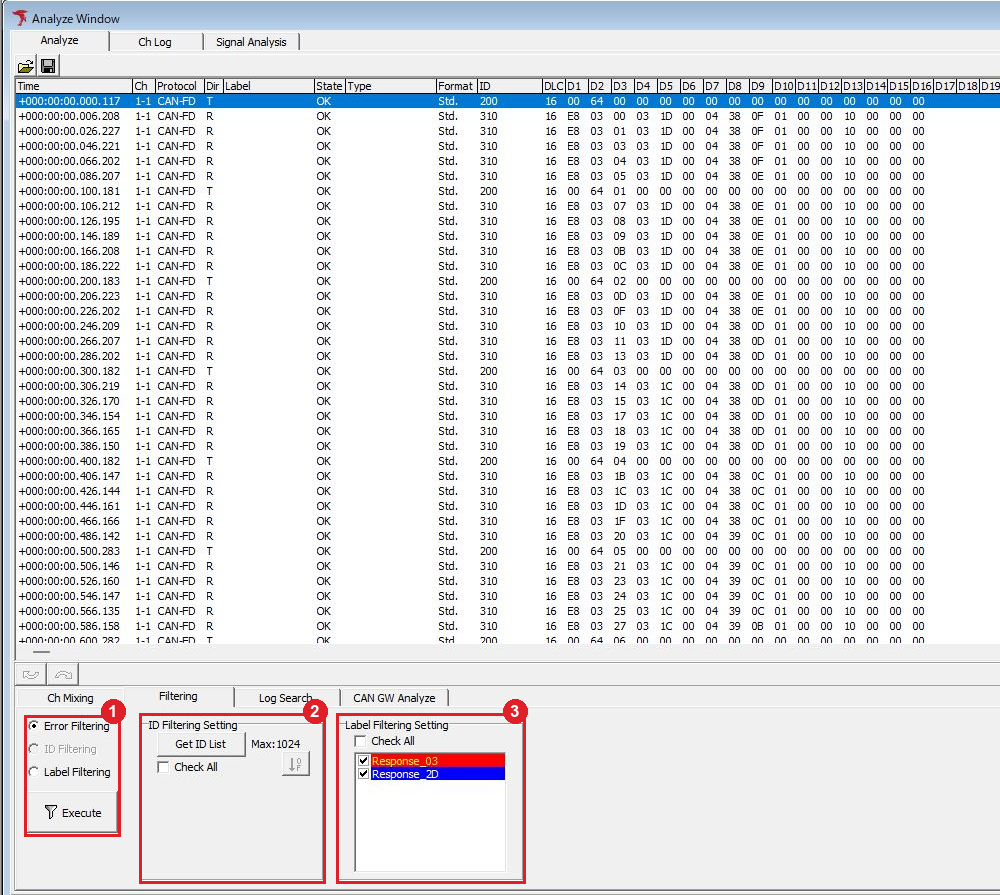
Figure 1. Filtering tab location and settings regions.
| No. | Item | Description |
|---|---|---|
| ① | Error Filtering | Selects the filter that excludes error frames. |
| ID Filtering | Selects filtering by ID. Available after retrieving the ID list with Get ID List. | |
| Label Filtering | Selects filtering by label. Available when labels are configured in “Label Filter Window.” | |
| Execute button | Runs the selected filter type and displays only log data matching the conditions. | |
| ② | ID Filtering Setting | Region for configuring target IDs for ID Filtering. |
| Get ID List button | Lists IDs from the log displayed in Analyze Window in ID List. “Max:1024” is the ID list limit. Use the sort button at the upper right of the list to sort IDs. | |
| Check All | Selects all IDs when checked and clears all ID selections when unchecked. | |
| ID List | A checked ID is included in the display; an unchecked ID is excluded. | |
| ③ | Label Filtering Setting | Region for configuring target labels for Label Filtering. |
| Check All | Selects all labels when checked and clears all label selections when unchecked. | |
| Label List | Shows labels configured in “Label Filter Window.” A checked label is included in the display; an unchecked label is excluded. |
To restore the previous display after filtering, click the left arrow (Undo) below the log.
Error Filtering Procedure
Error Filtering excludes error frames and displays normal log data.
- Select the “Error Filtering” radio button
- Click “Execute”
- Check the display with error frames excluded
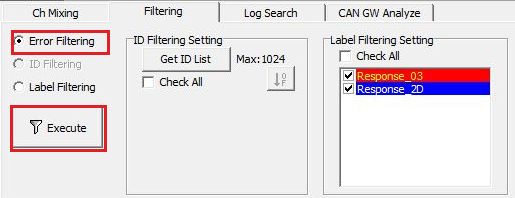
Figure 2. Selecting and running Error Filtering.
ID Filtering Procedure
ID Filtering displays only log data for specified CAN IDs. This example displays only 310 from IDs 200 and 310 in the list.
- Click “Get ID List” to display CAN IDs
Clicking Get ID List displays CAN IDs from the log with all checked, and automatically selects “ID Filtering.” Figure 3 shows CAN Std. 200 and CAN Std. 310.
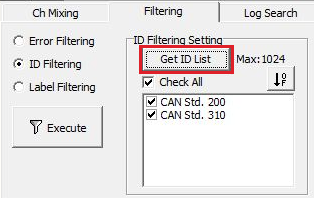
Figure 3. Retrieving the ID list with Get ID List.
- Clear checkboxes for CAN IDs you do not want to display
In Figure 4, CAN Std. 200 is unchecked and only CAN Std. 310 is checked.
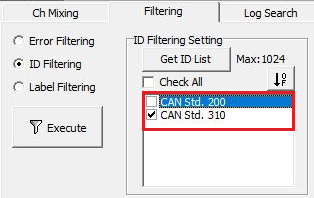
Figure 4. Selecting only the ID to display.
- Check that “ID Filtering” is selected
If you switched to another filter, select the “ID Filtering” radio button again.
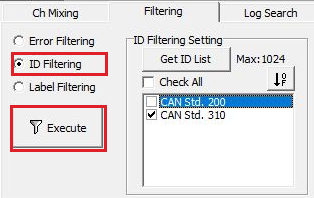
Figure 5. ID Filtering selection and Execute location.
- Click “Execute” and check the displayed results
Only log data for the selected CAN IDs is displayed. In Figure 6, every entry in the ID column is 310.
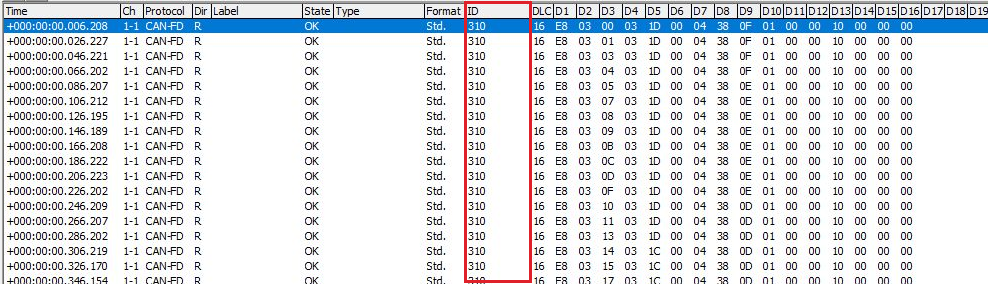
Figure 6. Log filtered to ID 310.
Label Filtering Procedure
Label Filtering displays only target labels configured in “Label Filter Window.” Configure labels using the label feature and, if necessary, undo the previous filtered display with the left arrow (Undo) before proceeding.
This example displays only CAN-FD RX from the configured labels Response_03, Response_2D, and CAN-FD RX. Here, CAN-FD RX targets standard-ID CAN-FD received data with State OK.
- Open the “Filtering” tab in “Analyze Window”
If labels are configured, “Label Filtering” is available and the label list appears in “Label Filtering Setting.”
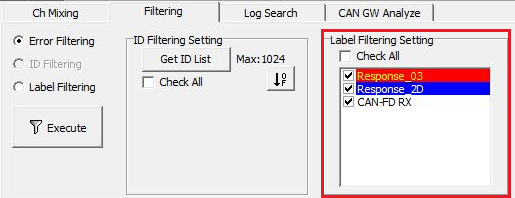
Figure 7. List of configured labels.
- Select target labels in “Label Filtering Setting”
Clear labels you do not need to display. In Figure 8, Response_03 and Response_2D are unchecked and only CAN-FD RX is checked.
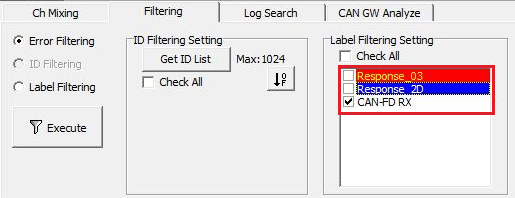
Figure 8. Selecting only the label to display.
- Select the “Label Filtering” radio button
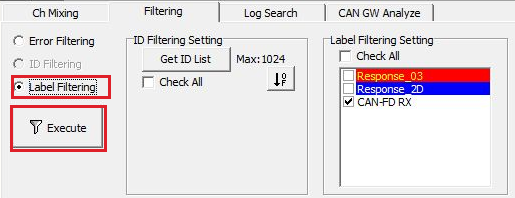
Figure 9. Label Filtering selection and Execute location.
- Click “Execute” and check the displayed results
Only log data for selected labels is displayed. In Figure 10, every entry in the Label column is CAN-FD RX. This example log has Dir R and ID 310.
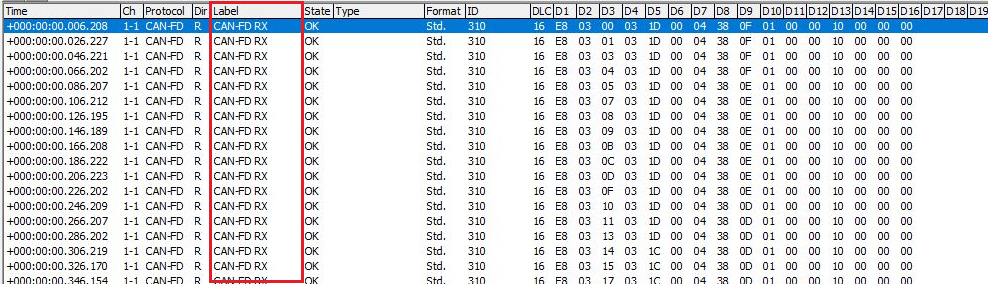
Figure 10. Log filtered to CAN-FD RX.