Communication Settings
Configure communication settings for connected MicroPeckerX in the Device Window.
Always configure this before starting monitoring.
Basic Operation
The communication setup flow is as follows.
- Open Device Window
SelectDevice Windowfrom the menu or toolbar.
-
Select target channel
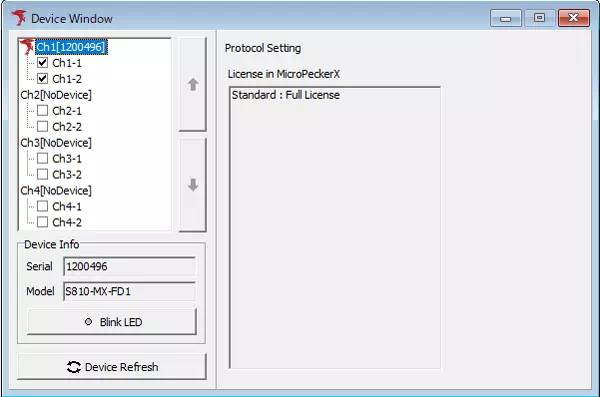
Click a connected channel (Ch1-1/Ch1-2) and theProtocol Settingarea switches to communication settings.
When connecting MicroPeckerX to multi-channel CAN buses, configure each channel individually. -
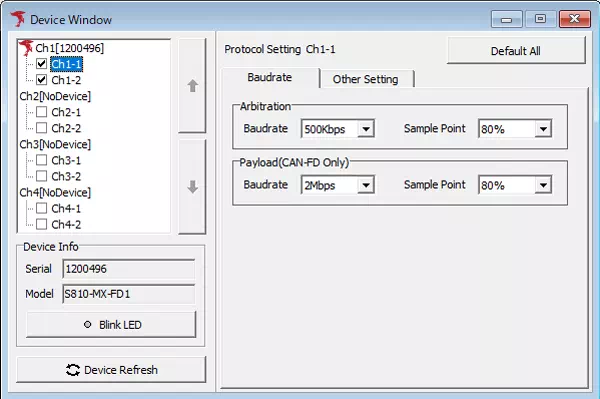
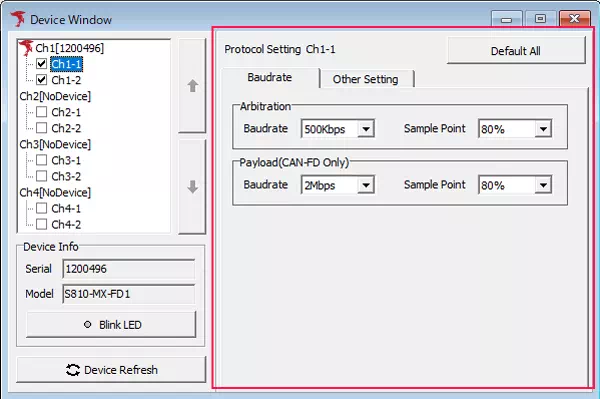
Baudrate settings
In theBaudratetab of Protocol Setting, you can select CAN bus baud rate and sample point from presets.
Payload settings are available only for CAN FD.
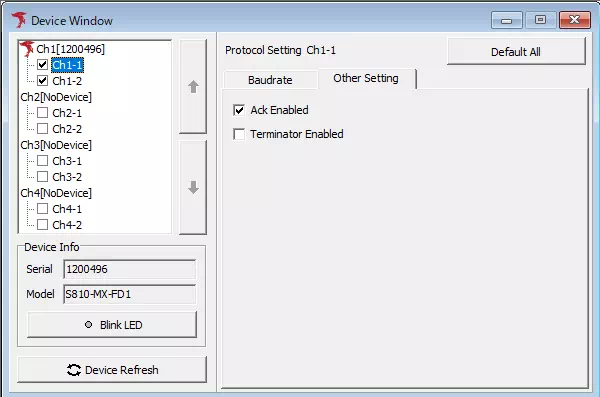
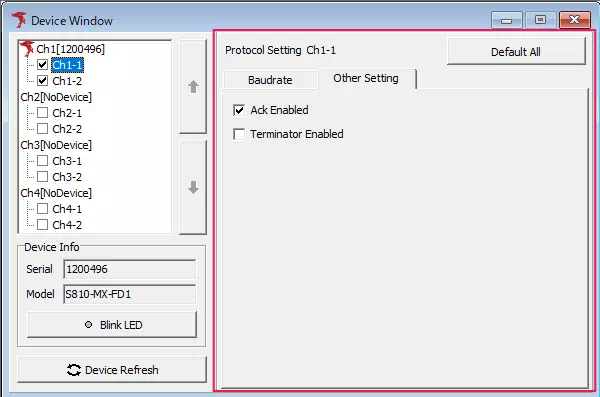
- Ack response and terminator settings
In theOther Settingtab of Protocol Setting, you can set Ack response from MicroPeckerX and terminator ON/OFF.
Communication settings are now complete.
Device Window Description
| No. | Item | Description |
|---|---|---|
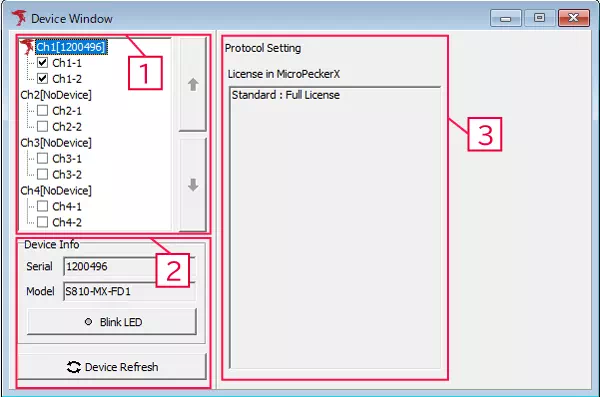
| 1 | Device List | Shows a list of connected MicroPeckerX units. You can enable/disable each channel with checkboxes. |
| Up/Down buttons | When multiple MicroPeckerX units are connected, select a target unit and click up/down to change connected channel order. | |
| 2 | Device Info | Displays serial number and model of the MicroPeckerX selected in Device List. |
| Serial | Displays serial number of selected MicroPeckerX. | |
| Model | Displays model of selected MicroPeckerX. | |
| Blink LED button | Blinks LED on selected MicroPeckerX to identify the target unit. Clicking the button blinks green and yellow LEDs. Click again to stop blinking. | |
| Device Refresh button | Re-detects MicroPeckerX devices connected to the PC. | |
| 3 | Protocol Setting | Shows licenses registered on the selected MicroPeckerX in Device List. If no device is recognized, No Device is displayed.Selecting each channel in Device List displays communication setting screen. |
Baudrate Tab
Click each channel in Device List to display communication settings.
In the Baudrate tab, you can configure communication baud rate and sample point.
| Item | Description | |
|---|---|---|
| Protocol Setting | Displays selected channel information. | |
| Baudrate/Other Setting tab switch | Switches Protocol Setting display between Baudrate and Other Setting. | |
| Arbitration (note1) | Baudrate | Sets communication baud rate. Select from: 1 M, 500 k, 250 k, 125 k [bps] |
| Sample Point | Sets sample point. Select from: 60, 65, 70, 75, 80, 85 [%] | |
| Payload (CAN FD Only) (note2) | Baudrate | Sets communication baud rate for CAN FD payload. Select from: 5 M, 4 M, 2 M, 1 M, 500 k [bps] |
| Sample Point | Sets sample point. Select from: 60, 70, 80 [%] | |
| Default All button | Sets Protocol Setting of target channel to default values. Defaults are: - Arbitration: Baudrate 500 kbps, Sample Point 80% - Payload (CAN FD Only): Baudrate 2 Mbps, Sample Point 80% | |
note1: Available Sample Point combinations vary by Baudrate.
note2: Valid for CAN FD. Payload Baudrate/Sample Point combinations vary depending on Arbitration Baudrate.
Other Setting Tab
In the Other Setting tab, you can set Ack response and terminator ON/OFF for MicroPeckerX.
| Item | Description |
|---|---|
| Protocol Setting | Displays selected channel information. |
| Baudrate/Other Setting tab switch | Switches Protocol Setting display between Baudrate and Other Setting. |
| Ack Enabled | Sets whether Ack response is sent from MicroPeckerX. Always enable this when simulation transmission is used. |
| Terminator Enabled | Turns MicroPeckerX terminator resistor ON/OFF. Check to enable terminator. |
| Default All button | Sets Protocol Setting of target channel to default values. Defaults are: - Ack Enabled: Enable - Terminator Enabled: Disable |