Log Replay Function
The log replay function can transmit log content exactly as recorded in this tool's log file format.
Up to 1.2 million records can be used as replay targets.
Product Usage Image
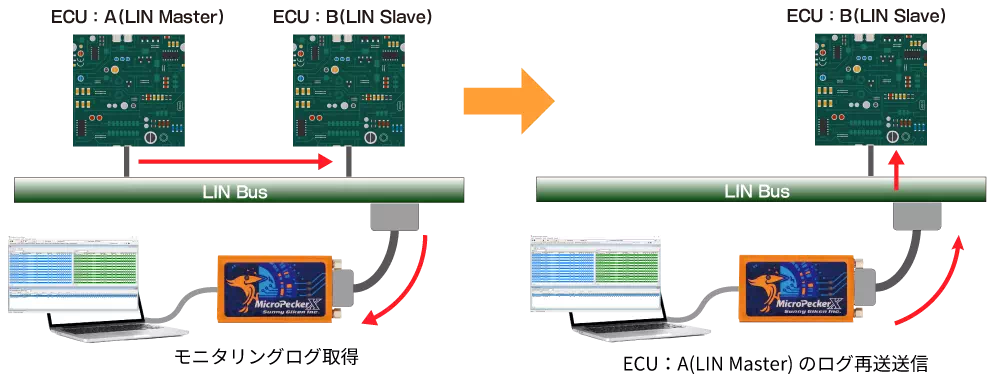
By capturing communication logs between ECUs in advance, communication simulation by log replay is possible even without ECU:A.
Basic Operation
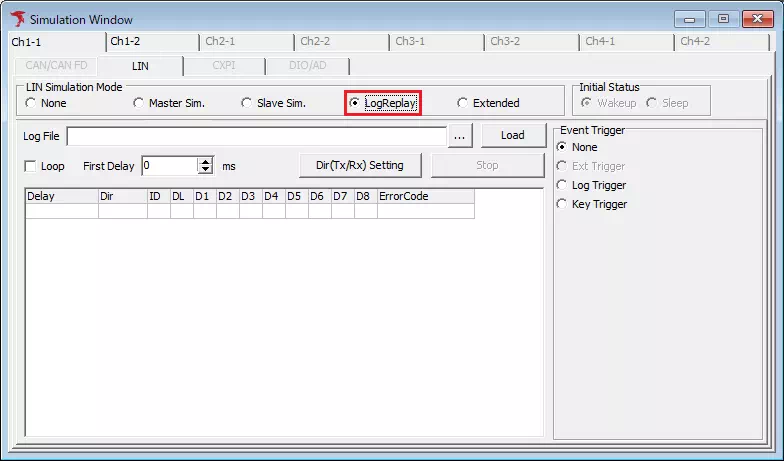
- Select Log Replay in Simulation Window
Select "Simulation Window" from the menu or toolbar, and select "Log Replay" from "Simulation Mode".
This enables the log replay function.
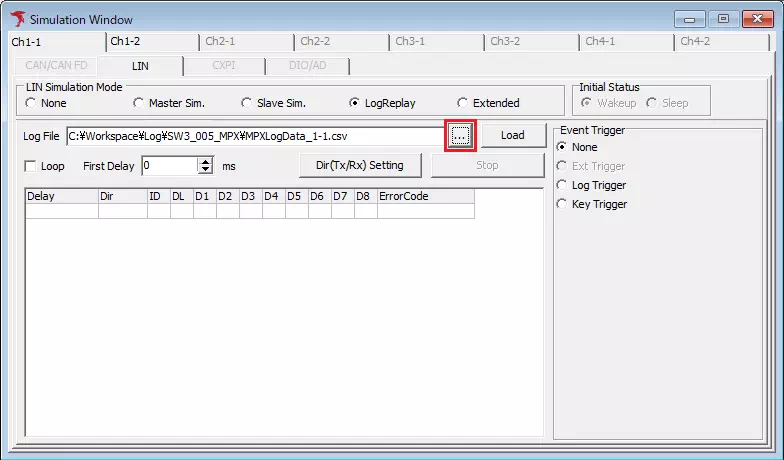
- Specify target log file to load
Click the "..." button for "Log File".
A file dialog appears. Specify the MicroPeckerX log file to load.
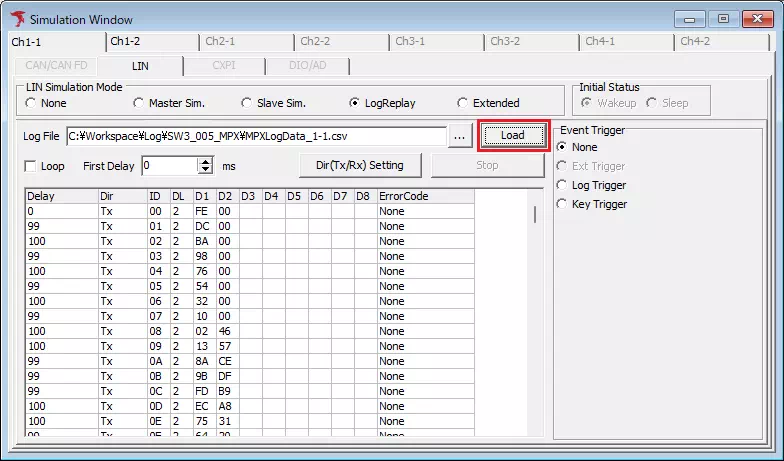
- Load log file
Confirm that the path of the log file specified in step 2 is shown in "Log File", then click the load button.
The data in the specified log file is loaded.
- Start monitoring
Start monitoring by one of the following operations.
- Select "Command" - "Start" from the menu bar.
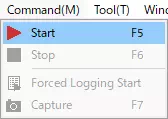
- Click the
 button on the toolbar.
 - Press the F5 key.
Frames are transmitted based on the log file content loaded in step 3.
Log Replay Screen Description
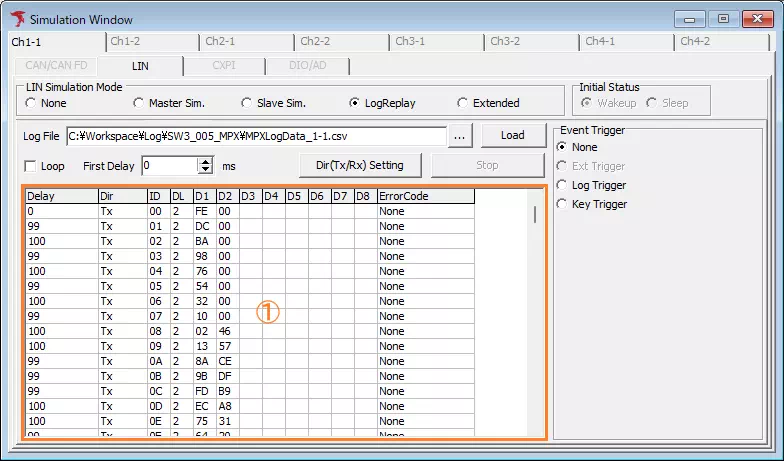
| Item | Description | Notes |
|---|---|---|
| Log File | Displays full path of the target log file selected in file dialog from the  button. button. | The target log file can also be set by directly entering full path. |
| Button | Click to display file dialog and select target log file to load. | The selected log file is not loaded until the |
 Button Button | Click to load the log file shown in "Log File". | MicroPecker log files cannot be loaded. |
| Loop | Sets whether log replay transmission repeats. Meanings of checkbox ON/OFF are: [ON] After transmitting the bottom log data in the list, returns to top and transmits log data sequentially again. [OFF] After transmitting the bottom log data in the list, transmission stops and enters waiting state. | |
| First Delay | Sets time in milliseconds until transmission of the top log data in the log data list. Configurable range is "0 to 60000". If "None" is set for "Event Trigger", this is elapsed time from monitoring start. Otherwise, it is elapsed time from event detection. | When changed by spin button, value increases/decreases in 10 ms units. |
 Button Button | Click to open "LIN LogReplay Dir Stting" dialog and set type of transmission frame by ID. For details, see "LIN LogReplay Dir Stting". | |
 Button Button | Click to stop log data transmission. | After transmission is stopped with this button, transmission cannot be resumed. To retransmit log data, you must stop monitoring once. |
| Log Data List (Area 1) | Displays log data included in loaded log file. | Records with the following Type are excluded from display target: Header, Bit Err., Nores. Err., H. Timeout, UART Err., Bus Err., B-Sleep Records with the following Type are displayed, but response becomes dummy value (00H for all bytes): Parity Err., SyncBrk. Long, SyncBrk. Short, SyncField Err. Delay value of each log data is the time difference from Time of the log data directly above it (microsecond part truncated). For the top log data only, Delay is set to the configured "First Delay" value. |
| Event Trigger | Sets whether to use event trigger and its occurrence condition. For details, see "Event Trigger". |
LIN LogReplay Dir Setting
You can set transmission frame type by ID.
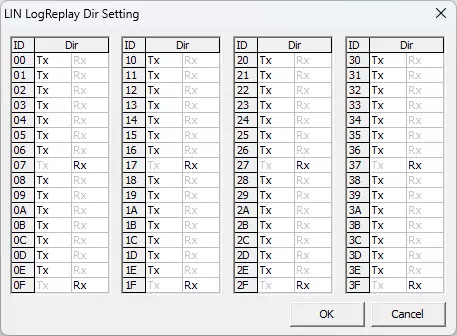
| Item Name | Description |
|---|---|
| Dir | Sets transmission frame type. Click "Tx" or "Rx" to change to that type. |
 Button Button | Click to save transmission frame type changes and close dialog. |
 Button Button | Click to discard transmission frame type changes and close dialog. |
Event Trigger
Sets whether to use event trigger and its occurrence condition.
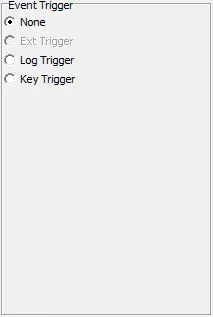
| Item | Description | Notes |
|---|---|---|
| None | Event trigger is not used. | |
| Ext Trigger | Detects port input as event. | This feature is under development and cannot be used. |
| Log Trigger | Detects specified monitoring log as event. | |
| Key Trigger | Detects specified key input as event. |
Log Trigger Setting
In Log Trigger, configured logs can be detected as events.
Various conditions such as specific data and errors can be set.
Log Trigger Screen Description
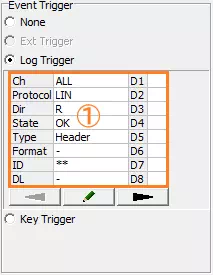
| Screen Menu | Description |
|---|---|
| Event Condition (Area 1) | Displays log information configured as event occurrence condition. Double-clicking this area opens "Trigger Setting" dialog and allows configuring log information for event condition. |
 Button Button | Click to open "Trigger Setting" dialog and configure log information for event condition. |
For details of "Trigger Setting" dialog, see "Trigger Setting Dialog Screen Description".
Key Trigger
In Key Trigger, key input from keyboard can be detected as events.
This enables operations such as transmitting frames by key input.
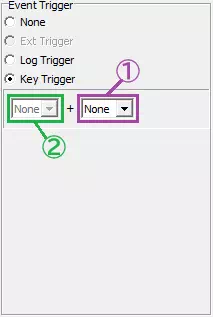
| Item | Description | Notes |
|---|---|---|
| Main Key (Area 1) | Sets key used as trigger. Pull-down options are: None, A, B, ..., Z, 0, 1, ..., 9, F1, F2, ..., F12, SPACE | If "None" is set for main key, event detection by key input is disabled, so log data transmission is also disabled. |
| Sub Key (Area 2) | Sets sub key used together with main key as trigger. Pull-down options are: None, Alt, Ctrl, Shift Set "None" when not using sub key. | Event detection cannot be done with sub key only. |