Label Function
With the label function, you can add labels to logs that match specific conditions and highlight them by changing text and background colors in the following windows.
- Monitor Window
- Each ID Window
- Analyze Window
Configure label settings in the Label Filter Window.
Basic Operation
The following explains how to register labels and highlight logs that match specific conditions.
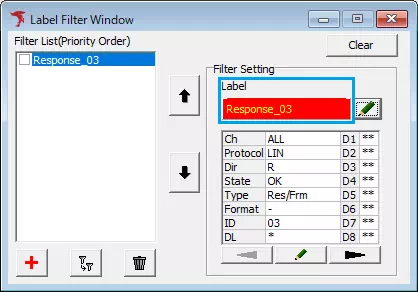
- Open Label Filter Window
SelectLabel Filter Windowfrom the menu or toolbar.
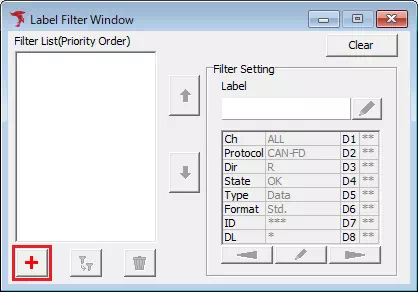
- Open Label Filter Setting dialog
Click button. The Label Filter Setting dialog appears.
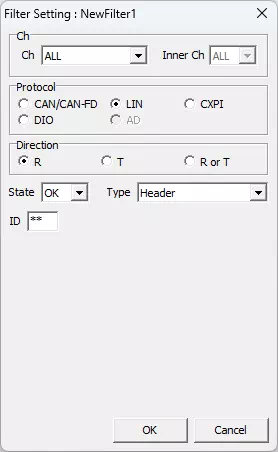
- Set label filter condition
In Label Filter Setting dialog, configure conditions for logs to be labeled (protocol, channel, direction, etc.).
For details of Label Filter Setting, see Trigger Setting dialog description. (Title bar text differs, but operation is the same.)
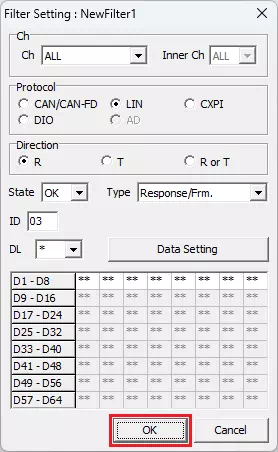
- Register label filter condition
Click in Label Filter Setting dialog.
The configured label is registered and shown in the Filter List of Label Filter Window.
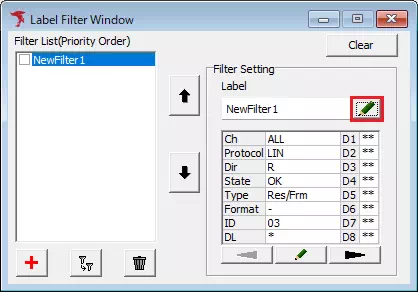
- Open Label Setting dialog
Select the label registered in step 4 from Filter List, then click .
.
Label Setting dialog appears, and you can edit style of the selected label.
Immediately after registering a label in step 4, that label is already selected in Filter List.
- Set label style
In Label Setting dialog, configure style (label name, text color, background color).
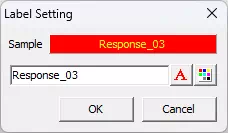
For details, see Trigger Setting dialog description. (Title bar differs, operation is the same.)
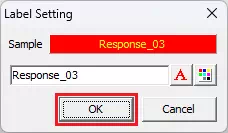
- Save label style
Click in Label Setting dialog.
The style is saved and reflected in theLabelarea of Label Filter Window.
To register multiple labels, repeat steps 2 through 7.
- Enable labels
Turn ON the checkbox for labels you want to enable in Filter List.

- Start monitoring
When monitoring starts, logs matching enabled label conditions are labeled inMonitor WindowandEach ID Window.
After monitoring stops, labels are also applied inAnalyze Window.
Label function is not applied to log files themselves.
Example of Log Display with Label Function ON/OFF
Label Function Enabled
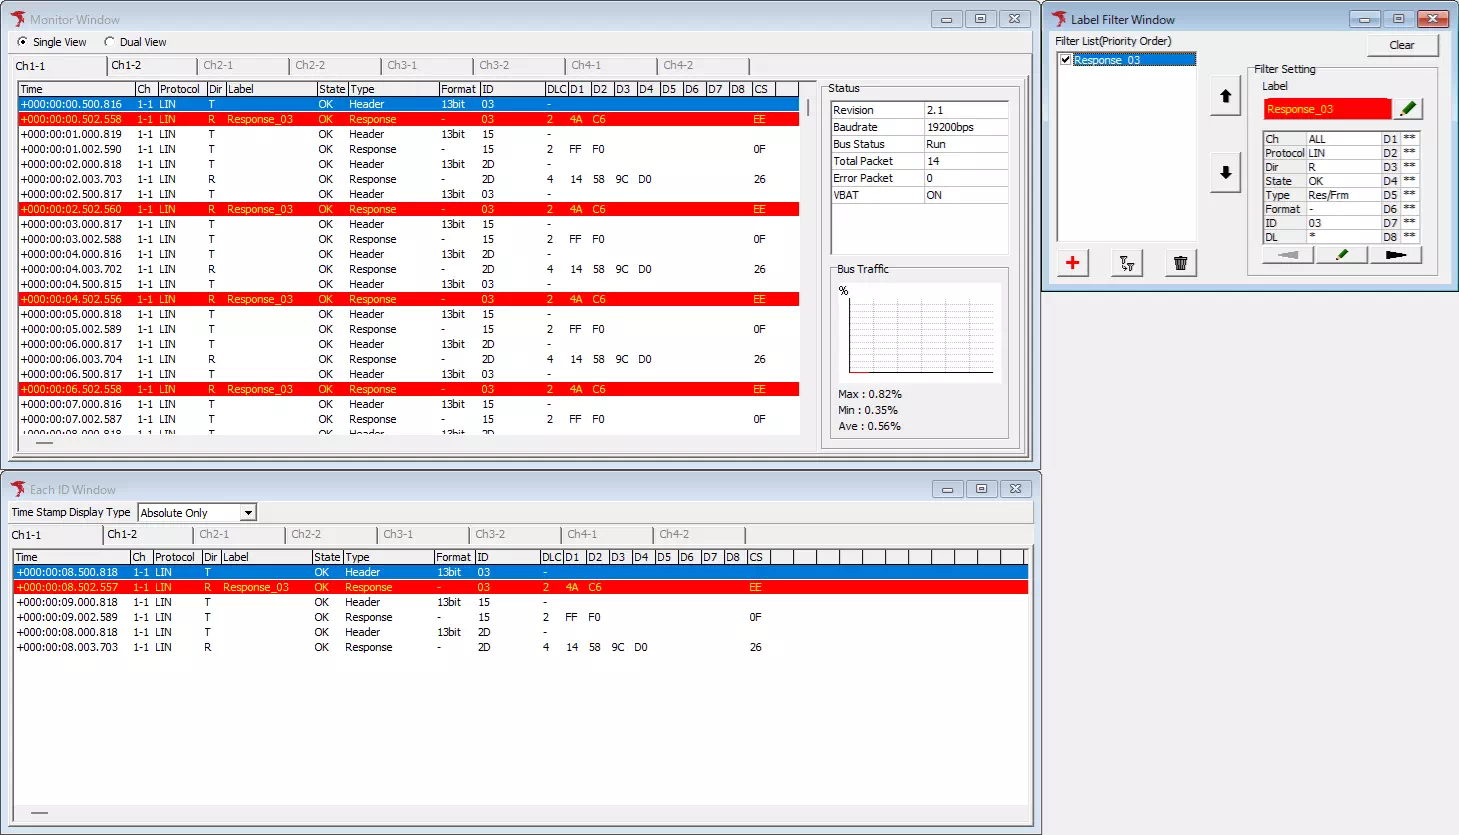
In this case, logs matching filter condition of registered label (Response_03) are labeled.
Label Display Disabled
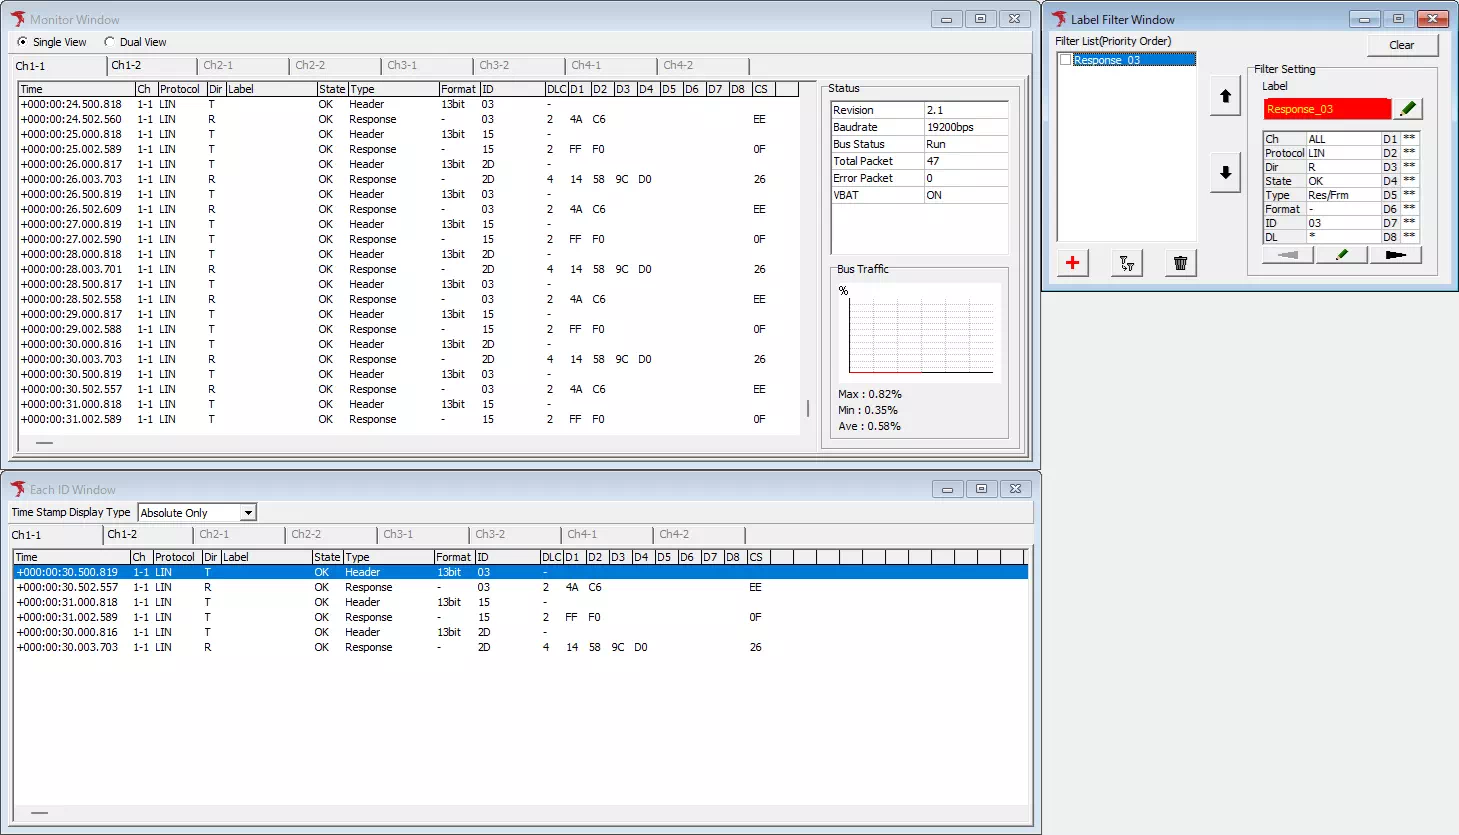
In this case, registered label (Response_03) is disabled, so matching logs are not labeled.
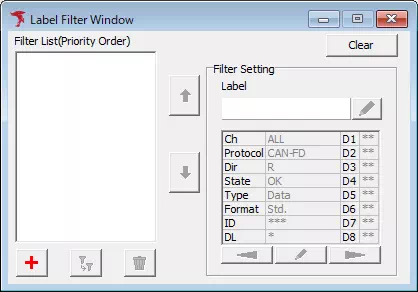
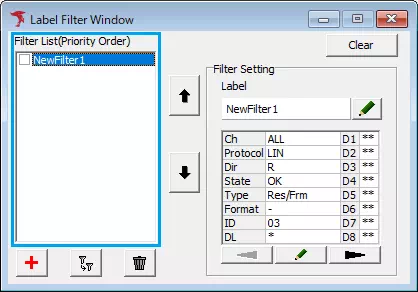
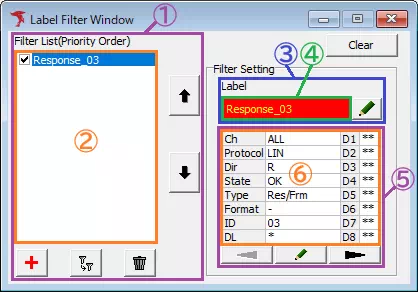
Label Filter Window Description
| Item | Description | Notes | |
|---|---|---|---|
| Filter List (Area 1) | Filter List (Area 2) | Shows registered labels. Each checkbox enables/disables the label. | Labels higher in the list have higher priority. |
 button button | Moves selected label in Filter List up by one position. This increases its priority. | ||
 button button | Moves selected label in Filter List down by one position. This lowers its priority. | ||
| button | Opens Filter Setting dialog to register a new label filter condition. | ||
 button button | Opens Filter Setting dialog and creates a new label filter condition based on the selected label. | Label style is not copied. | |
 button button | Shows confirmation dialog below. Click Yes to delete selected label in Filter List.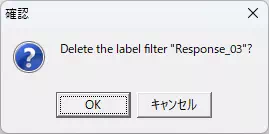 | ||
| Label (Area 3) | Label style display area (Area 4) | Shows style of label selected in Filter List. | Double-click this area to open Label Setting, same as clicking |
| button | Opens Label Setting dialog to edit style of selected label in Filter List. | ||
| Filter condition (Area 5) | Filter condition display area (Area 6) | Shows filter condition of selected label in Filter List. | Double-click this area to open Filter Setting, same as clicking  button, and edit selected label condition. button, and edit selected label condition. |
| button | Opens Filter Setting dialog to edit selected label condition in Filter List. | ||
 button button | Scrolls filter-condition display to previous page. | ||
 button button | Scrolls filter-condition display to next page. | ||
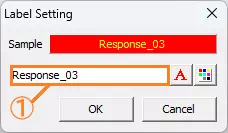
Label Setting Dialog
| Item | Description |
|---|---|
| Sample | Shows preview of label style based on configured label name, text color, and background color. |
| Label name (Area 1) | Sets label name. Up to 12 characters can be entered. |
Opens Color Setting dialog to change text color. | |
Opens Color Setting dialog to change background color. | |
| button | Saves configured label style and closes dialog. |
 button button | Discards configured label style and closes dialog. |
Filter Setting Dialog
Sets label filter conditions (protocol, channel, Tx/Rx direction, etc.).
Detailed operation is the same as Trigger Setting dialog (only title differs).