Communication Settings
Configure communication settings for connected MicroPeckerX devices in the Device Window.
Always perform this before starting monitoring.
Basic Operation
The communication setting flow is as follows.
- Open Device Window
SelectDevice Windowfrom the menu or toolbar.
- Select the target channel
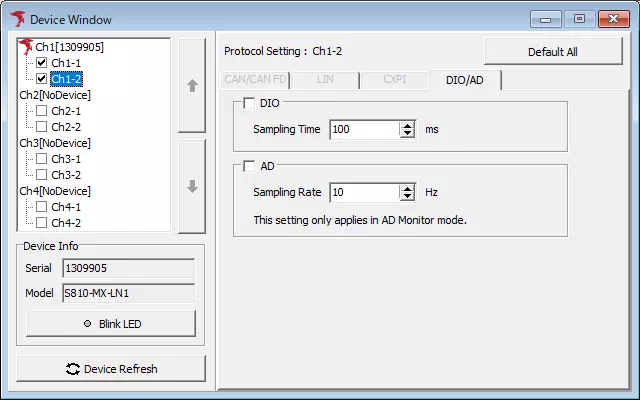
ClickCh*-2(* is 1 to 4) in the device list on the left side ofDevice Window. TheProtocol Settingarea switches to DIO/AD communication settings.
When using multiple MicroPeckerX units, configure communication settings for each channel used for DIO or A/D monitoring.
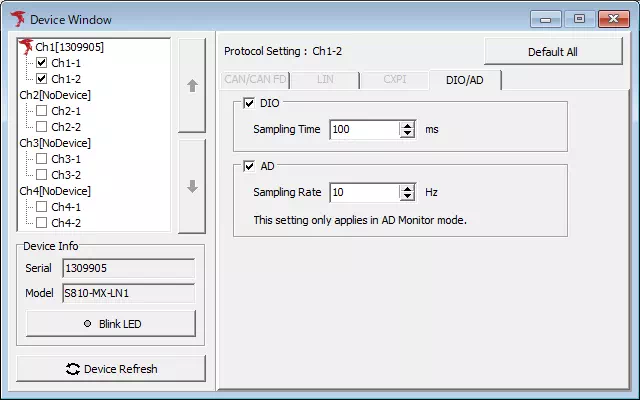
- Set DIO/AD enable and monitoring interval
InProtocol Setting, you can enable/disable DIO and A/D monitoring and set the data acquisition interval for each.
Device Window
| Item Name | Description | |
|---|---|---|
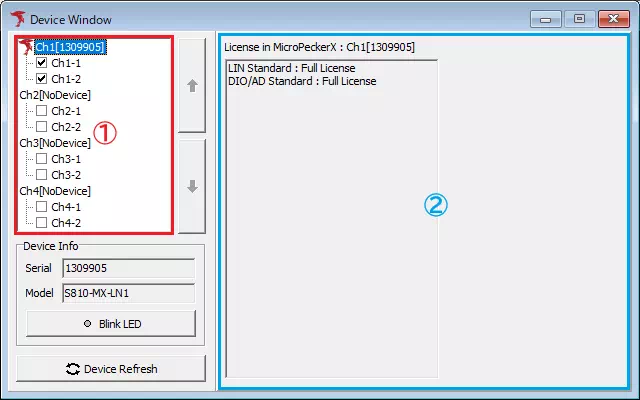
| Device List (Area 1) | Shows a list of MicroPeckerX devices recognized by MicroPeckerX Control Software. You can enable/disable each channel by toggling the checkbox to the left of each channel. | |
 button button | Moves the selected MicroPeckerX channel position in Device List up by one.For example, if a device assigned to Ch2 is selected, it is reassigned to Ch1 (the previous Ch1 device moves to Ch2). | |
 button button | Moves the selected MicroPeckerX channel position in Device List down by one.For example, if a device assigned to Ch2 is selected, it is reassigned to Ch3 (the previous Ch3 device moves to Ch2). | |
| Device Info | Serial | Displays the serial number of the MicroPeckerX selected in Device List. |
| Model | Displays the model of the MicroPeckerX selected in Device List. | |
 button button | Blinks the green and yellow LEDs on the selected MicroPeckerX. Click again to turn off LEDs. This helps identify the selected device in Device List. | |
 button button | Re-detects MicroPeckerX devices connected to the PC. | |
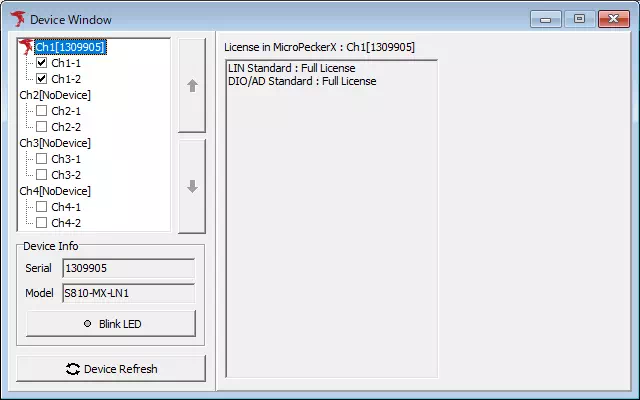
| Protocol Setting (Area 2) | If a serial-number row in Device List is selected, registered licenses for that MicroPeckerX are shown.If a channel row is selected, the communication setting screen is shown. If an unrecognized device is selected, No Device is shown. | |
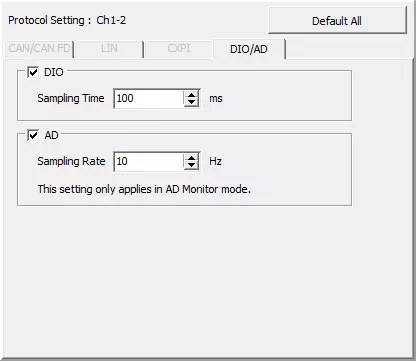
Protocol Setting
For DIO and AD monitoring, you can configure enable/disable and acquisition cycle.
| Item | Description | |
|---|---|---|
| DIO | DIO | Enables/disables DIO monitoring. [ON] Enable DIO monitoring. [OFF] Disable DIO monitoring. |
| Sampling Time | Sets DIO monitoring data acquisition cycle in milliseconds. Configurable range: 1-60000. | |
| AD | AD | Enables/disables AD monitoring. [ON] Enable AD monitoring. [OFF] Disable AD monitoring. |
| Sampling Rate | Sets AD monitoring data acquisition rate in Hz. Configurable range: 1-10000. | |
 button button | Resets Protocol Setting values for the target channel to default values.See Device Setting Defaults. | |
Device Setting Defaults
Resets settings in the Protocol Setting tab for the target channel to initial product defaults.
- Resets DIO/AD enable states and each sampling setting to defaults.
- Does not affect settings of other channels or other tabs.
Note: Defaults here match the default values at installation time.