Workflow
Use MicroPeckerX InstaGW with the following flow.
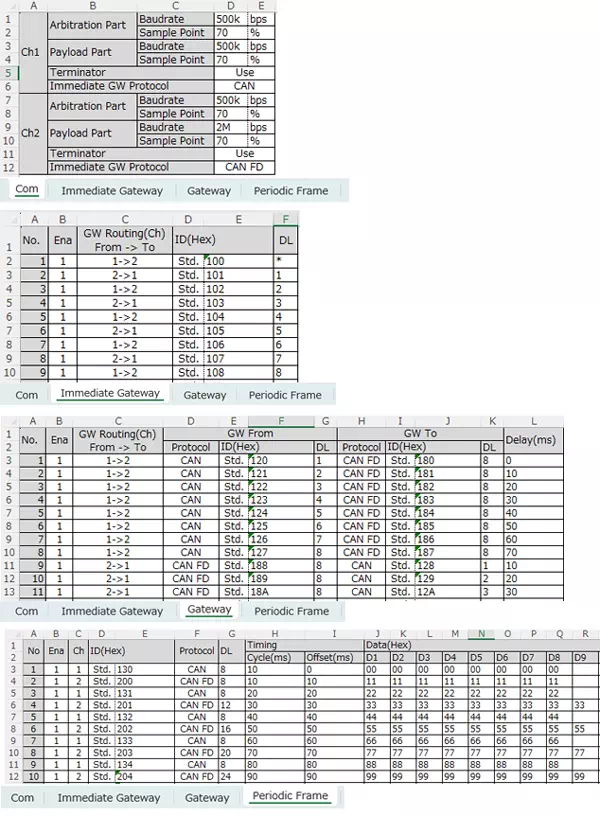
1. Edit GW Setting File
- Use the Excel-format GW setting file to configure communication settings (CAN/CAN FD), gateway target IDs, and cyclic transmission IDs/data.
- Template files are stored in the
Settingfolder of the installation package.
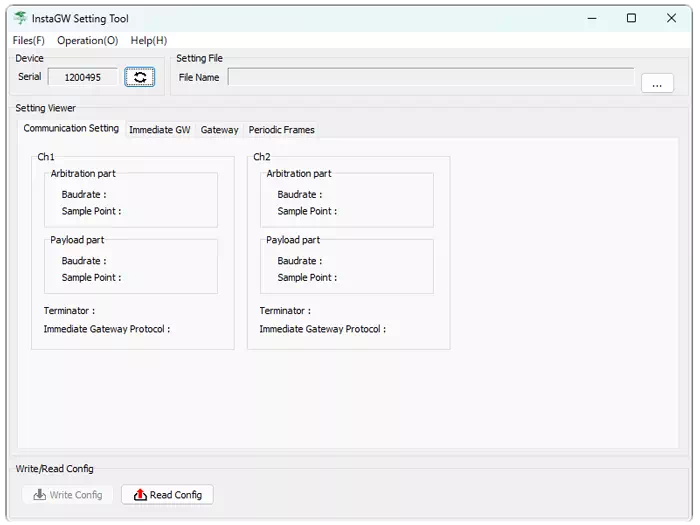
2. Start Configuration Software
Start the GUI application with the following steps.
- Open the Windows Start menu.
- Open
All apps, then expand theInstaGWfolder. - Click
InstaGW Setting Tool Ver. x.xx(x.xxis the product version).
3. Connect MicroPeckerX
Connect MicroPeckerX to a USB port on your PC and verify that it is recognized by the configuration software.
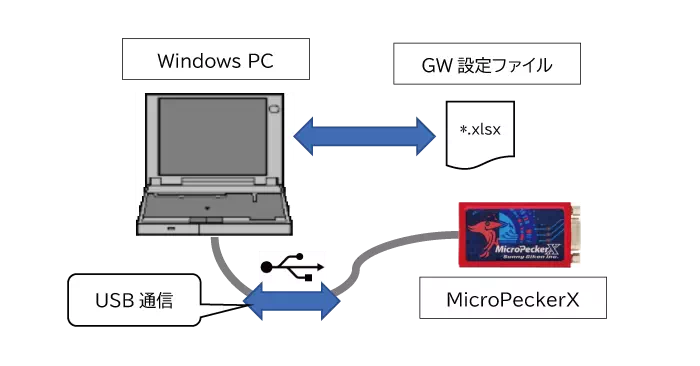
You may perform "2. Start Configuration Software" and "3. Connect MicroPeckerX" in reverse order. In that case, a connected MicroPeckerX is recognized automatically when the software starts.
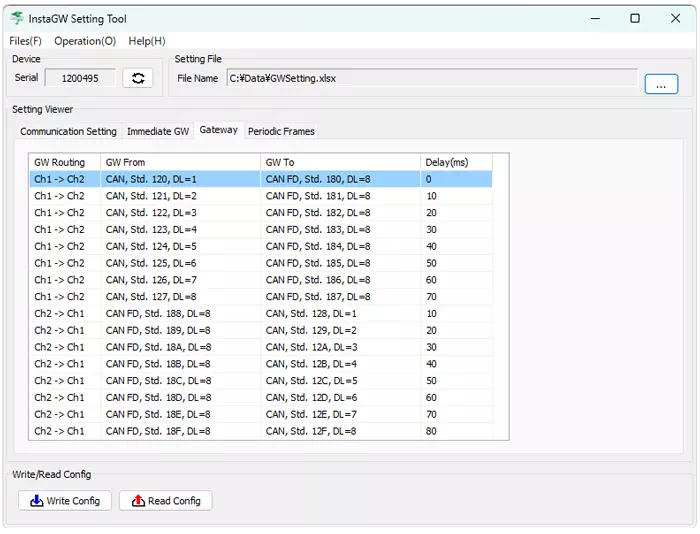
4. Load GW Setting File
Load the edited GW setting file in the configuration software. Check the displayed content to ensure all settings are correct.
5. Write Settings to MicroPeckerX
Write GW setting data from the configuration software to MicroPeckerX. The settings are stored in the unit, enabling standalone operation.
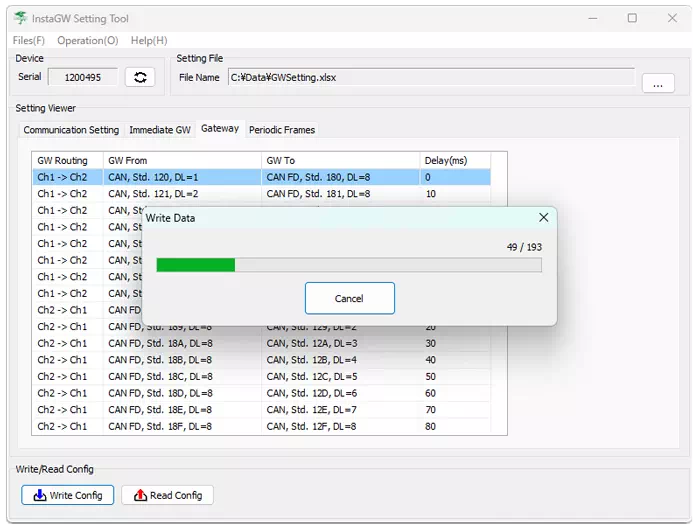
GW settings written to the MicroPeckerX unit do not take effect until the unit is power-cycled.
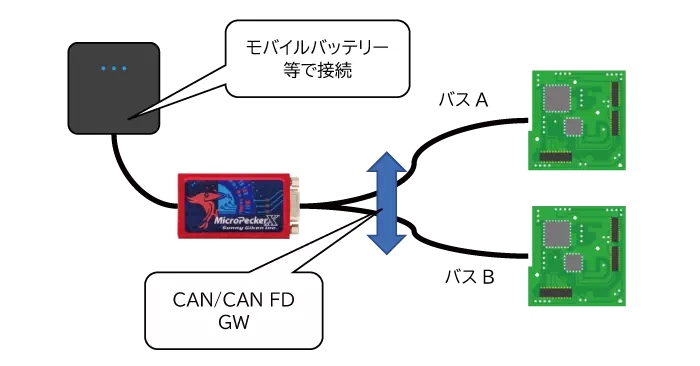
6. Run MicroPeckerX InstaGW
Connect the CAN 2ch DSub cable to MicroPeckerX, then connect CAN cable connectors Ch1 and Ch2 to their corresponding CAN buses. When USB power is supplied, MicroPeckerX runs according to the written settings.
- If CAN/CAN FD transmission stops (for example, due to power loss on the connected side), some internal reset handling occurs. If GW processing does not resume correctly, power-cycle MicroPeckerX.
- The internal timer used for GW and cyclic transmission supports up to approximately 9 days and 17 hours. For longer continuous operation, power-cycle MicroPeckerX as needed.