Usage Flow
Follow the steps below to configure the message authentication feature.
Security Setting
-
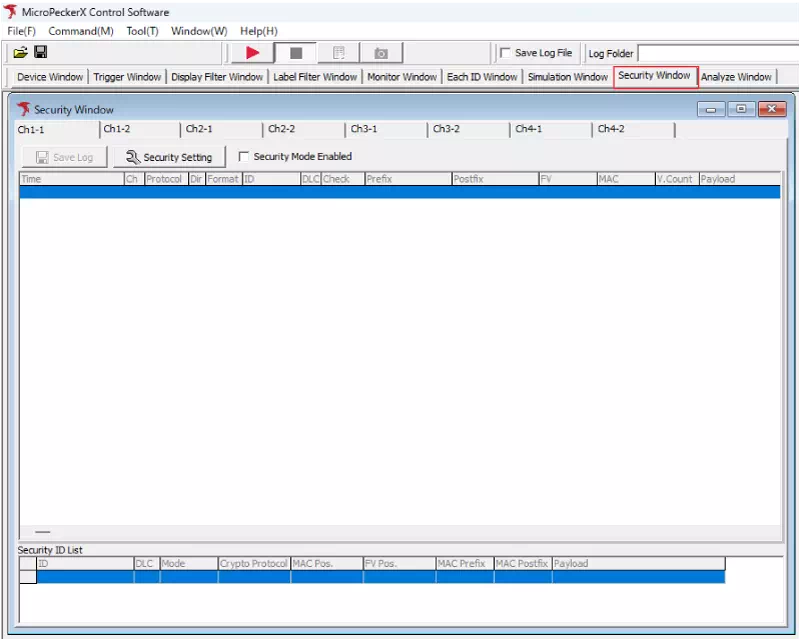
Open the Security Window
After installing the Message Authentication plug-in in MicroPeckerX Control Software, a “Security Window” becomes available. Open the Security Window from the menu or toolbar.
-
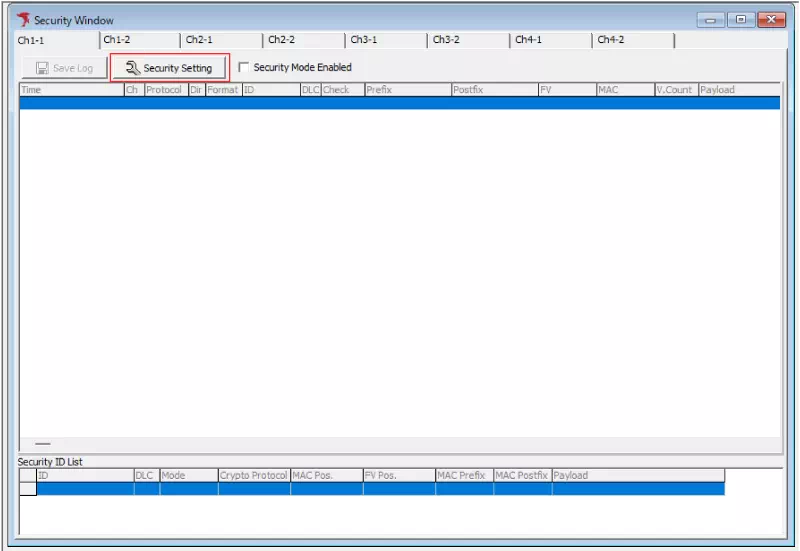
Open the Security Setting dialog
Click the tab of the channel you want to configure. Then click the “Security Setting” button to open the Security Setting dialog.
Channel Settings
Configure channel-wide message authentication settings on the Ch Setting tab.
-
Open the Ch Setting tab
Click the Ch Setting tab in the Security Setting dialog.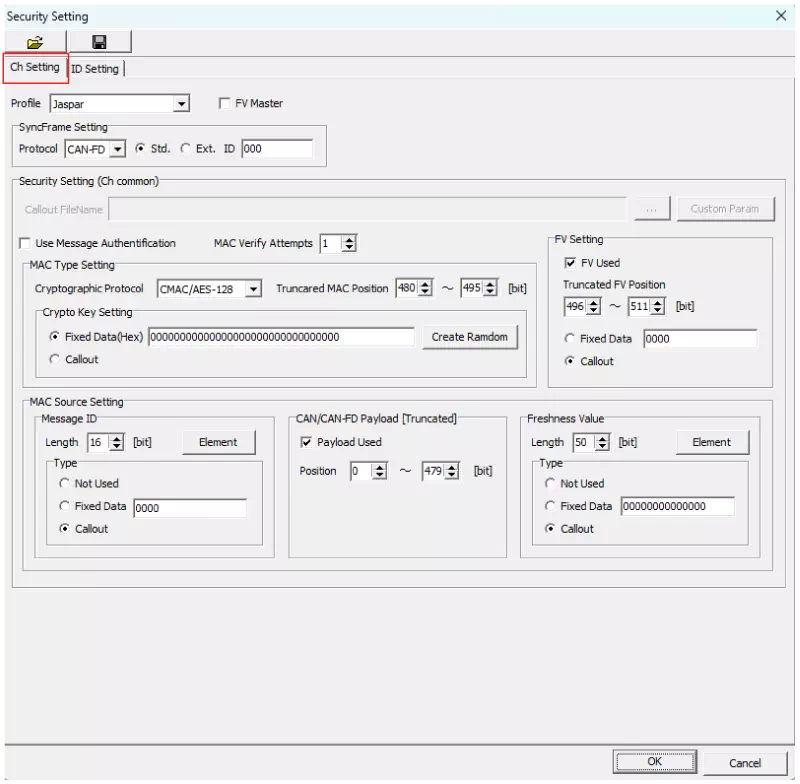
-
Select a profile
Choose the security profile for message authentication from the Profile dropdown.
-
Enable message authentication
Select the “Use Message Authentification” checkbox to enable message authentication.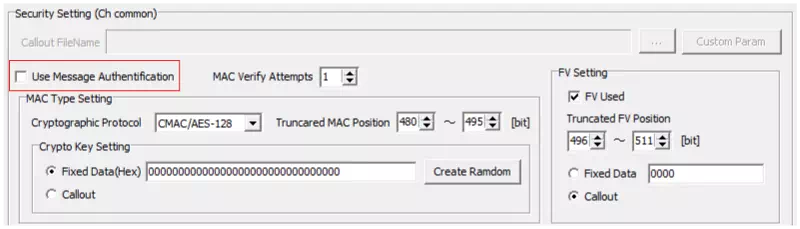
-
Configure FV Master/Slave
Use the “FV Master” checkbox to set the FV role. Select it for a master, or clear it for a slave.
-
Configure SyncFrame
Use “SyncFrame Setting” to configure the sync message.
-
Configure MAC Type
In “MAC Type Setting,” specify the MAC bit position in the data field and how to generate the key. If you use a fixed key, enter the value here.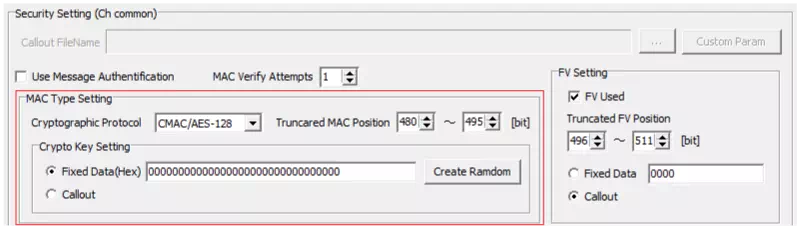
-
Configure the FV
Use “FV Setting” to enable or disable FV. When enabled, specify the FV bit position in the data field.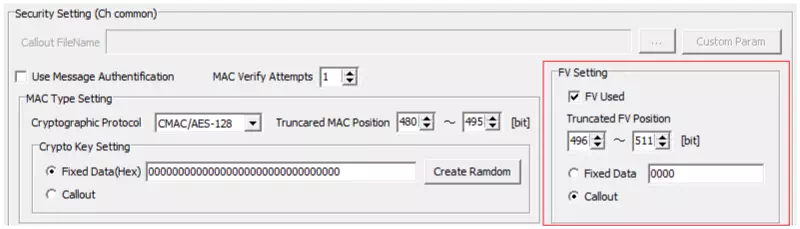
-
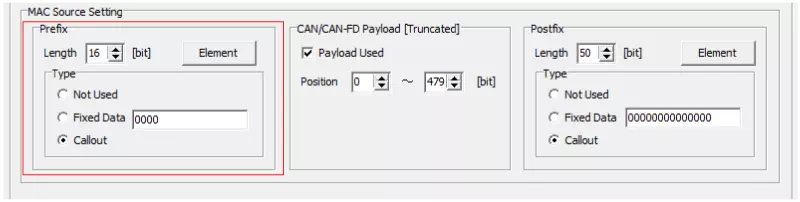
Configure MAC Source: Prefix
“MAC Source Setting” defines how the MAC input is generated.When Profile = Jaspar
If you select “Jaspar,” the elements are preconfigured to match the message ID specification. Enter only the initial values.
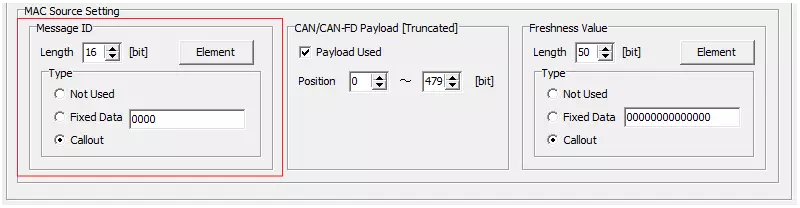
When Profile = Custom
If you select “Custom,” configure the prefix bit length, elements (name, bit position, initial value, etc.), and generation method.
-
Configure MAC Source: Payload
In “CAN/CAN-FD Payload,” enable or disable the payload input and specify its bit position in the data field.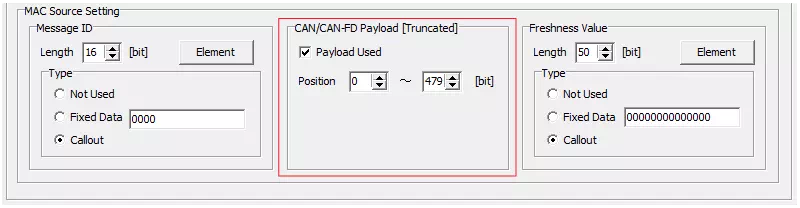
-
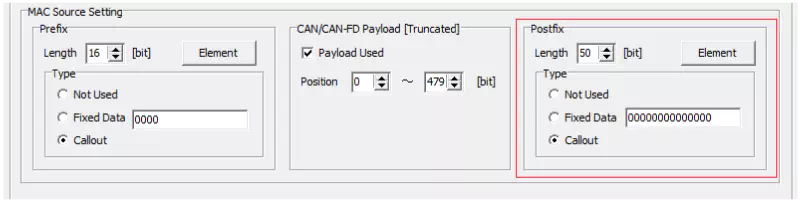
Configure MAC Source: FV
When Profile = Jaspar
If you select “Jaspar,” the FV elements are preconfigured. Enter the initial values only.
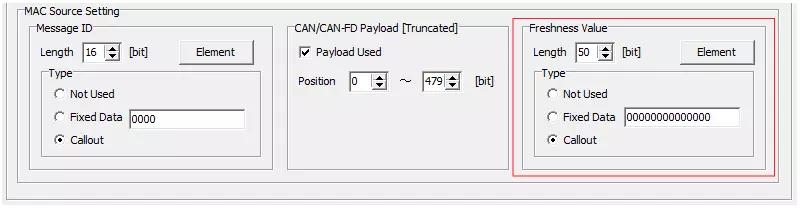
When Profile = Custom
If you select “Custom,” configure the postfix bit length, elements (name, bit position, initial value, etc.), and generation method.
ID Settings
Configure message authentication per CAN ID on the ID Setting tab.
-
Open the ID Setting tab
Click the ID Setting tab in the Security Setting dialog.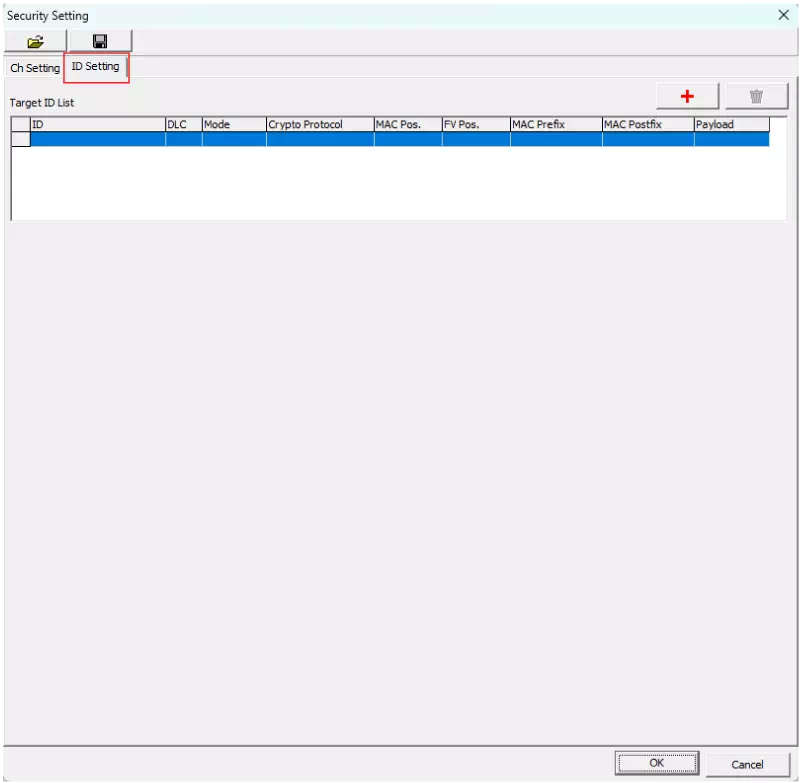
-
Add an ID setting
Click the button to add a message authentication setting for a CAN ID.
 -
Configure Target Frame Info
For each ID, use Target Frame Info to configure the frame details (CAN ID, transmit cycle, offset, etc.). To configure a periodic transmit frame, set Mode to “Periodic.” If the ID acts as an FV master, enter the message ID in the “ID” field.
-
Use Ch Setting
Clear the “Use Ch Setting” checkbox if you do not want to use the channel-wide settings. The Security Setting fields appear so you can configure authentication for the selected ID.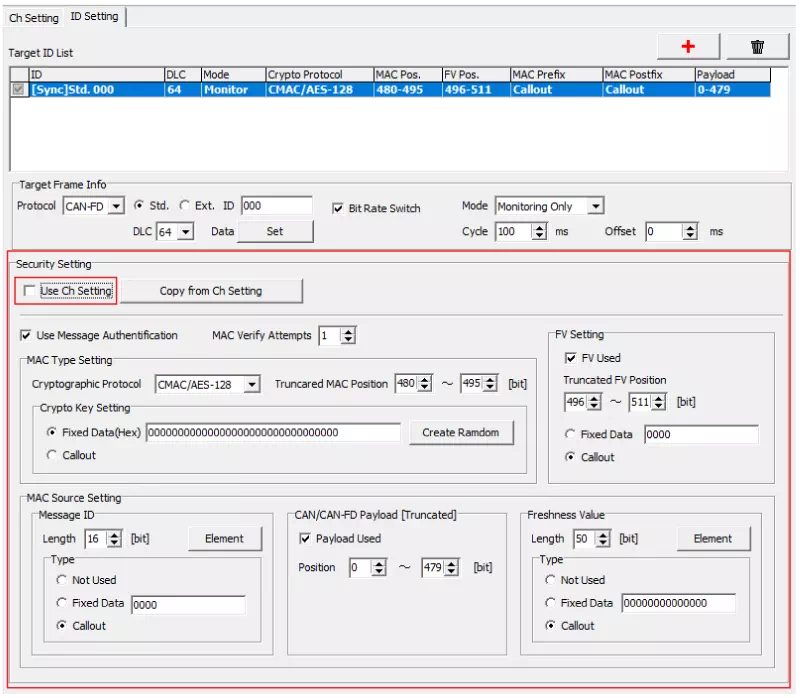
-
Configure all IDs
Repeat steps 2 to 4 for each CAN ID that requires message authentication. -
Close the Security Setting dialog
After completing all configurations, click “OK” to close the dialog.
Monitoring
The Security Window displays communication logs for security frames.
-
Enable Security Mode
On each channel tab in the Security Window, select “Security Mode Enabled.” Message authentication is now active.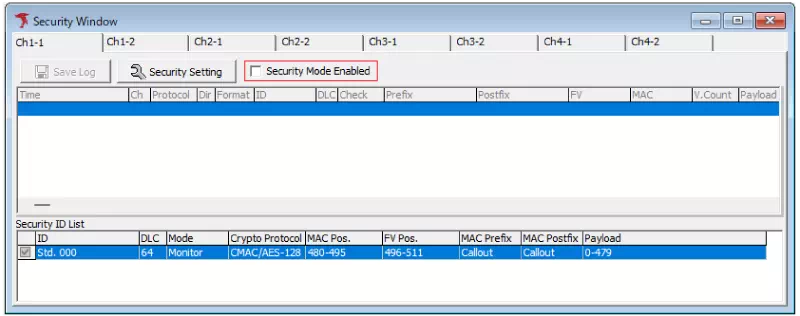
-
Start monitoring
After configuring the settings, click on the main window to begin monitoring CAN/CAN FD communication.
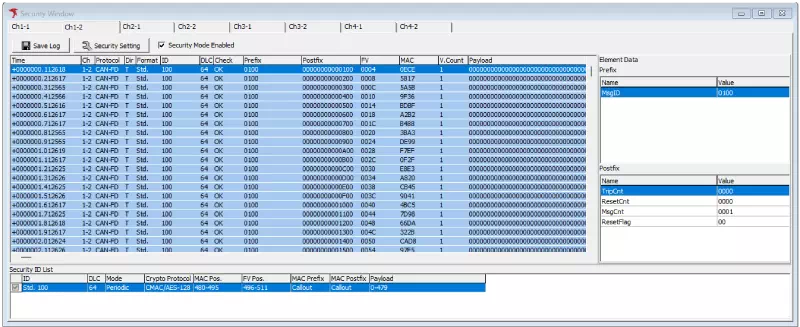
Security Window During Monitoring
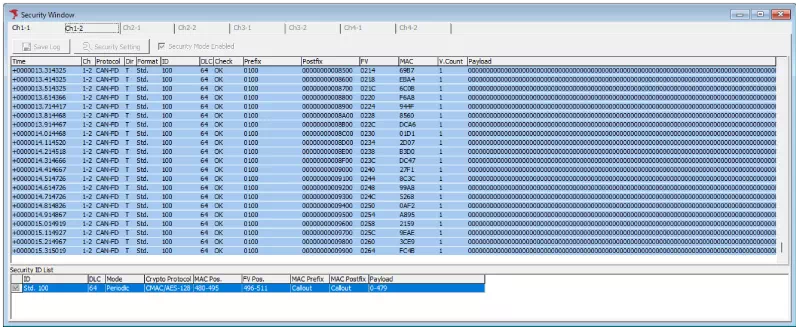
All transmitted and received security message logs appear in the Monitor Window and Security Window. In the Security Window, you can review the prefix and postfix for each log entry (or Message ID and FV when using the JASPAR profile).
Security Window After Monitoring