How to Use
Flow for Loading and Converting MicroPecker Configuration Files
The procedure for loading and converting MicroPecker configuration files is as follows:
- Open Config Converter Window
- Load the file you want to read/convert
- Select settings to apply
- Select destination channel
- Apply settings
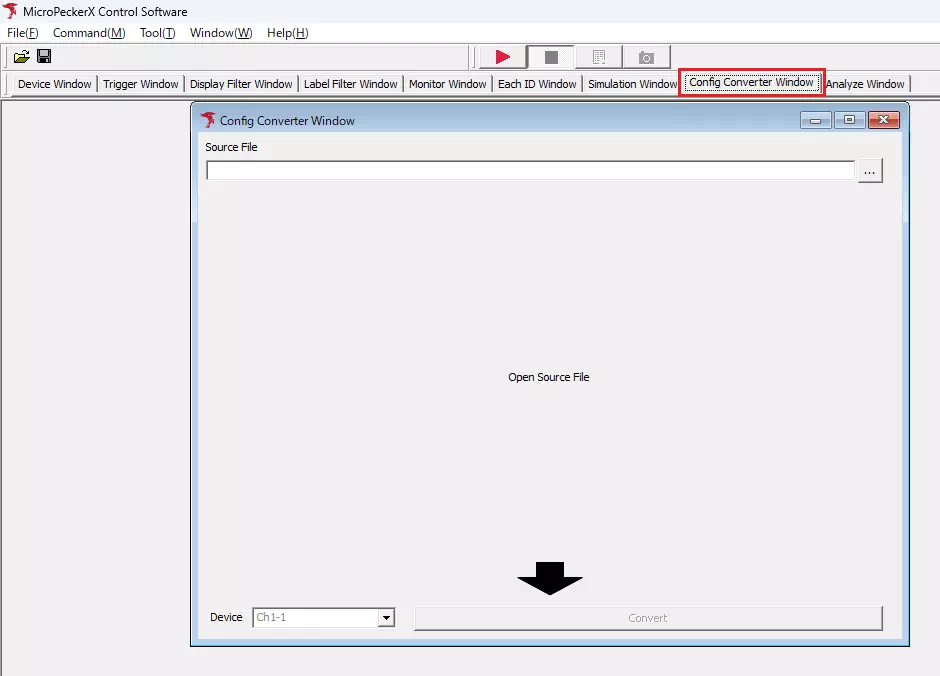
1. Open Config Converter Window
In MicroPeckerX Control Software, perform either of the following to open Config Converter Window.
- Select Window -> Config Converter Window from the menu bar.
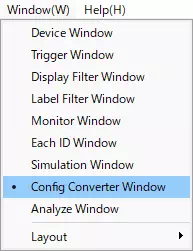
- Click the Config Converter Window tab on the toolbar.
2. Load the File You Want to Read/Convert
Click the  button. A file dialog opens; select the file you want to read/convert.
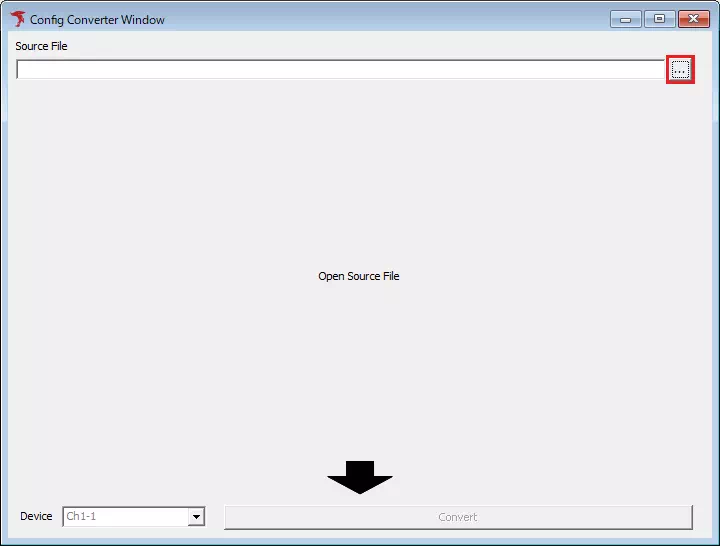
If the target file is not shown in the file dialog, switch file types using the File Type pull-down menu.
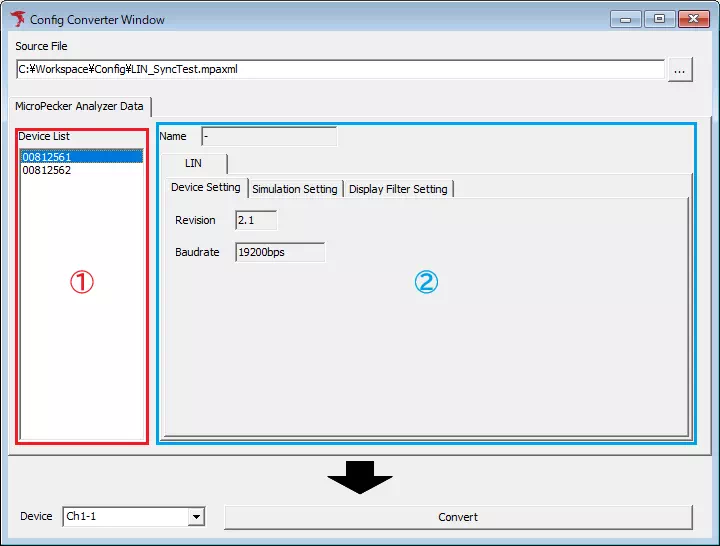
3. Select Settings to Apply
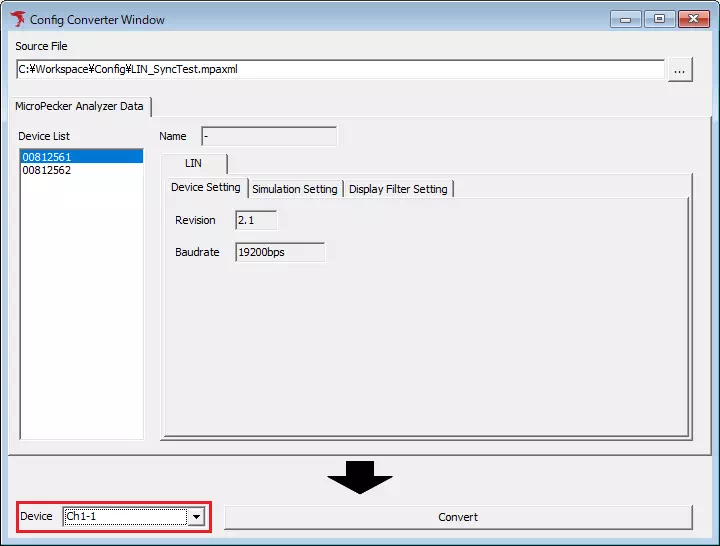
When a MicroPecker configuration file is loaded
A list of settings contained in the loaded configuration file is shown in Device List (Area 1). Select items to apply from that list.
Details of the selected setting are shown in Data Information (Area 2).
When a DBC file is loaded
A list of frames in the loaded DBC file is shown in Node - Frame Tree (Area 1). Select items to apply by turning checkboxes ON/OFF.
When you select a frame name, details for the selected frame are shown in Detail Info (Area 2).
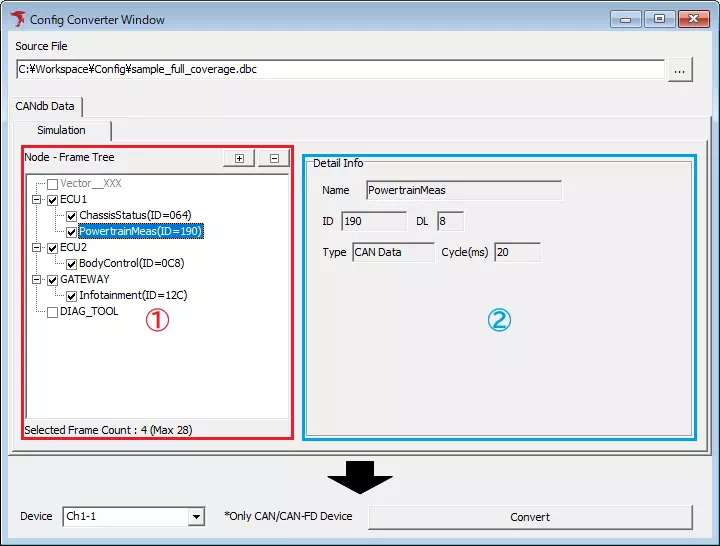
You can select up to 28 frames as application targets.
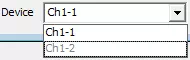
4. Select Destination Channel
From the Device pull-down menu, select the channel where settings selected in Step 3 will be applied.
If a channel number is shown in gray, the protocol differs from settings selected in Step 3, and the settings cannot be applied.
5. Apply Settings
Click the  button.
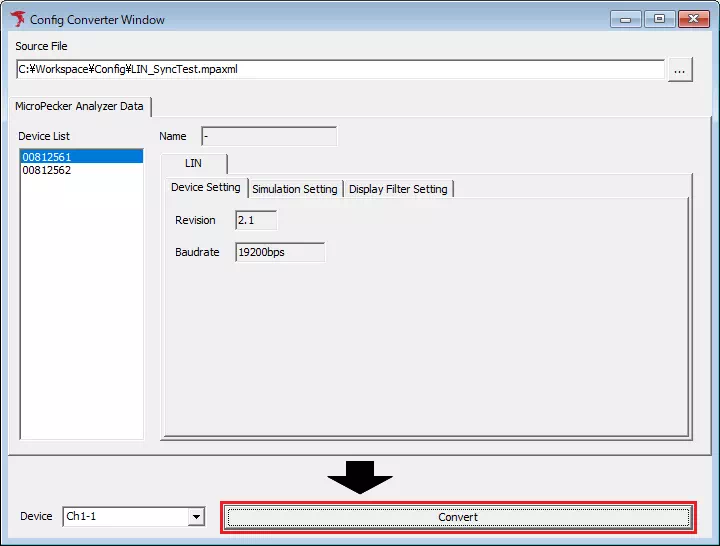
Then the following dialog appears. Click Yes to convert settings selected in Step 3 and apply them to the channel selected in Step 4.
If you click No, no settings are applied.

Converted configuration files are not saved automatically.