How to Update MicroPeckerX Firmware
info
The GUI application automatically checks whether MicroPeckerX firmware needs to be updated, so users do not need to check this manually.
When you connect a MicroPeckerX device to the PC and start the GUI application, or connect the device while the application is running, the application automatically checks the firmware version.
If the firmware is outdated, the MicroPeckerX Update Tool starts automatically.
To start the update tool manually, run it from the Windows Start menu:
Start -> All apps -> MicroPeckerX -> MicroPeckerX Update Tool
MicroPeckerX Update Tool
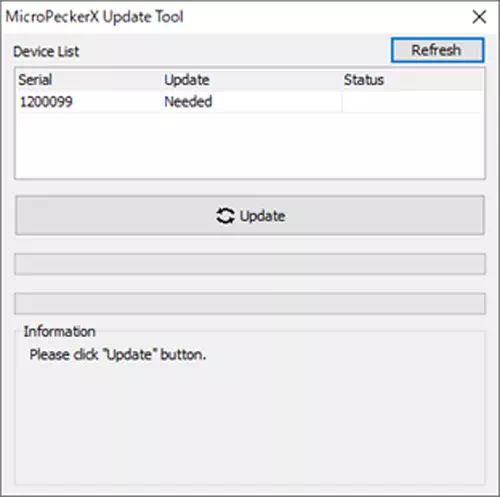
Display Items
The following items are shown in the Device List area.
| Item | Description | Values |
|---|---|---|
| Serial | Serial number of the MicroPeckerX device | - |
| Update | Whether an update is required | - Needed: Update required - Not Needed: Update not required |
| Status | Update status/result | - (blank): Waiting - Now Updating: Updating - Waiting: In queue - Success: Completed successfully - Failed: Failed |
-
If Update is Needed, click Update to update the MicroPeckerX firmware.
-
After the update, the display changes as shown below.
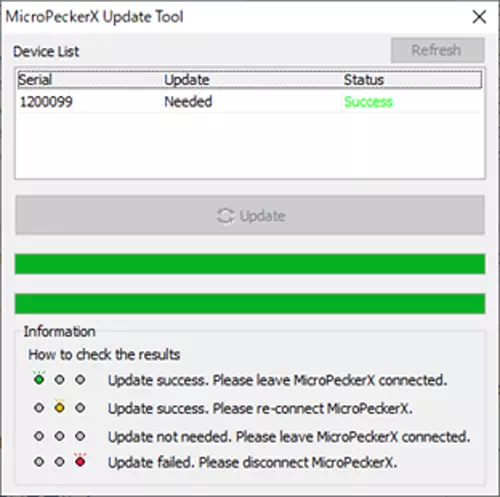
- Check the result by the LED status on the MicroPeckerX device and follow the instructions shown in the Information area.
LED status by update result is as follows.
| Status | Green LED | Yellow LED | Red LED |
|---|---|---|---|
| Update successful | 🟢 | ◯ | ◯ |
| Update successful (reconnect required) | ◯ | 🟡 | ◯ |
| Update not required | ◯ | ◯ | ◯ |
| Update failed | ◯ | ◯ | 🔴 |
- 🟢🟡🔴: ON
- ◯: OFF